Campaigns
Overview
The Campaigns module in SuiteCRM can be a very powerful marketing and advertising tool for your organisation allowing you to create and track both email and non-email based (e.g. telesales or radio) marketing campaigns to prospective or existing customers.
With the tracking tools built into the Campaign module you can monitor the response you receive from your campaign in real time, allowing you to view the Return On Investment (ROI) and many other useful metrics. This in turn helps you to plan your strategic marketing and advertising activities effectively by visualising which campaigns work and which do not.
-
To view the full list of fields available when creating a Campaign, see Campaign Fields List.
You will need to configure your outbound and bounce handling mail accounts in order to send an email-based campaign. See Email Settings for information on how to do this.
Campaign mail is sent using a scheduled job. You will need to ensure your scheduler is configured to do this.
Create a Campaign
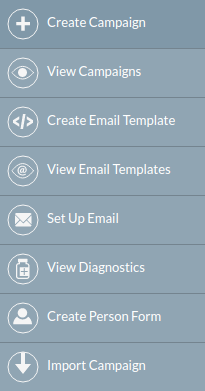
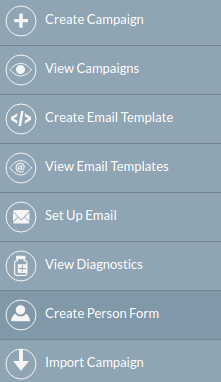
From the Campaigns module, select Create Campaign from the sidebar or the module dropdown menu to start the Campaign Wizard.
Select the campaign you wish to create: Newsletter, Email, Survey (SuiteCRM 7.10 onwards) or Non-email based Campaign. Non-email based campaigns allow you to keep a record of any campaigns that are run outwith SuiteCRM (e.g. a telesales or radio based campaign).
Note that for a Survey campaign you will first need to create the survey to attach to the campaign.
Campaign Header
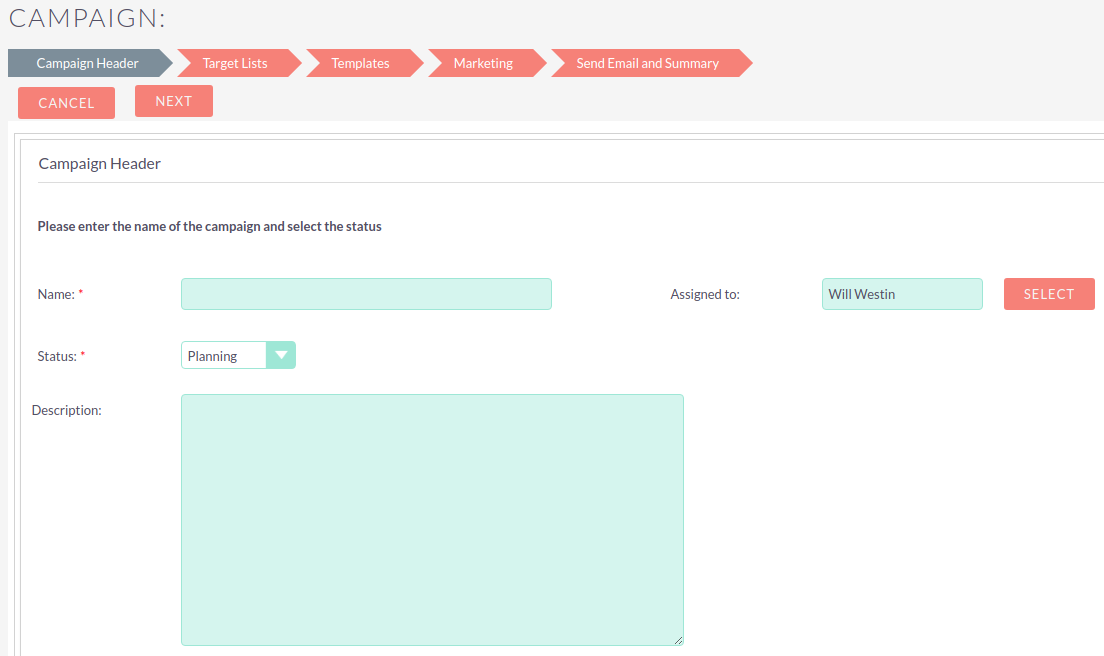
Enter a name for the campaign here and set the status (Planning, Active, Inactive, Complete).
Add an optional description.
The campaign will be assigned to the currently logged on user by default. Change this here if required.
Survey Campaign (SuiteCRM 7.10 onwards)
For a Survey campaign, you will also need to relate the campaign to an existing survey. See Surveys for information on creating a survey.

Non-Email Based Campaign
For a Non-Email Based campaign, you can optionally select the type of campaign.
Campaign Budget
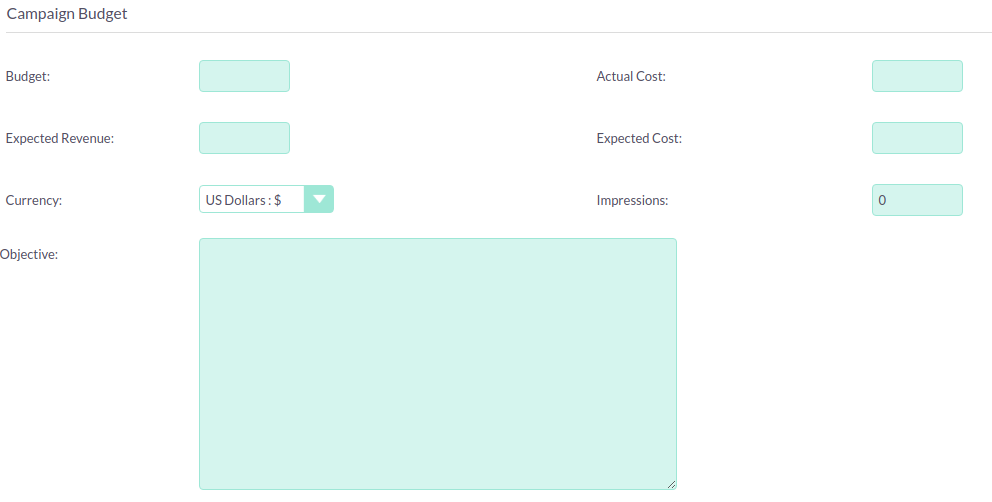
Scroll down to complete optional budget details for the campaign. These figures are used in ROI calculations.
For non-email based campaigns, this section is on the next page.
Click NEXT at the top of the screen to continue.
Target Lists
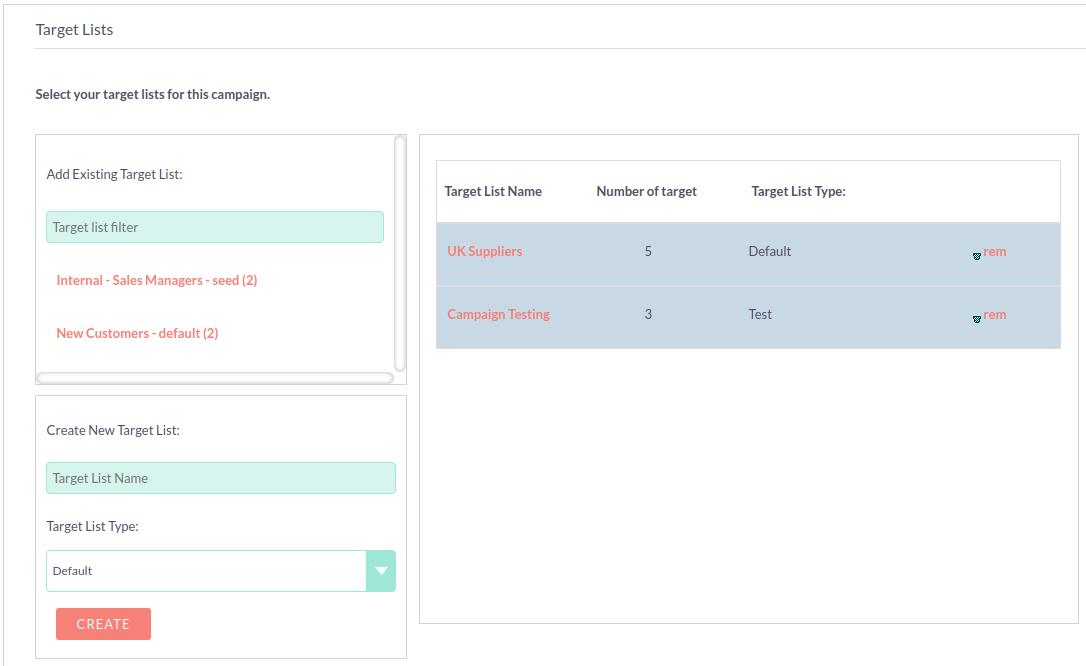
The next step is to specify your Target List(s). Any existing target lists will be listed for you to select under Add Existing Target List.
Click on the target list name to add it to the campaign. Target lists added to the campaign will appear in the right-hand panel.
To remove a target list, click rem
Create Target List
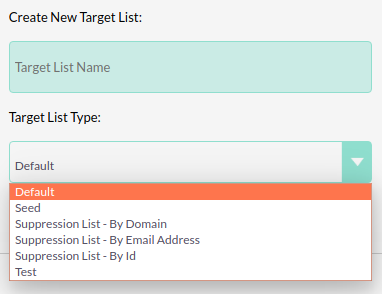
If you have not yet created a target list or wish to use a new list, you can create an empty one here and populate it after you have completed the rest of your campaign setup. See Target Lists for more information on the types of lists and how to use them.
Enter a name for the new list and select the type from the list. Note that you will need to have at least one 'default' type target list attached to the campaign.
Click CREATE
Templates
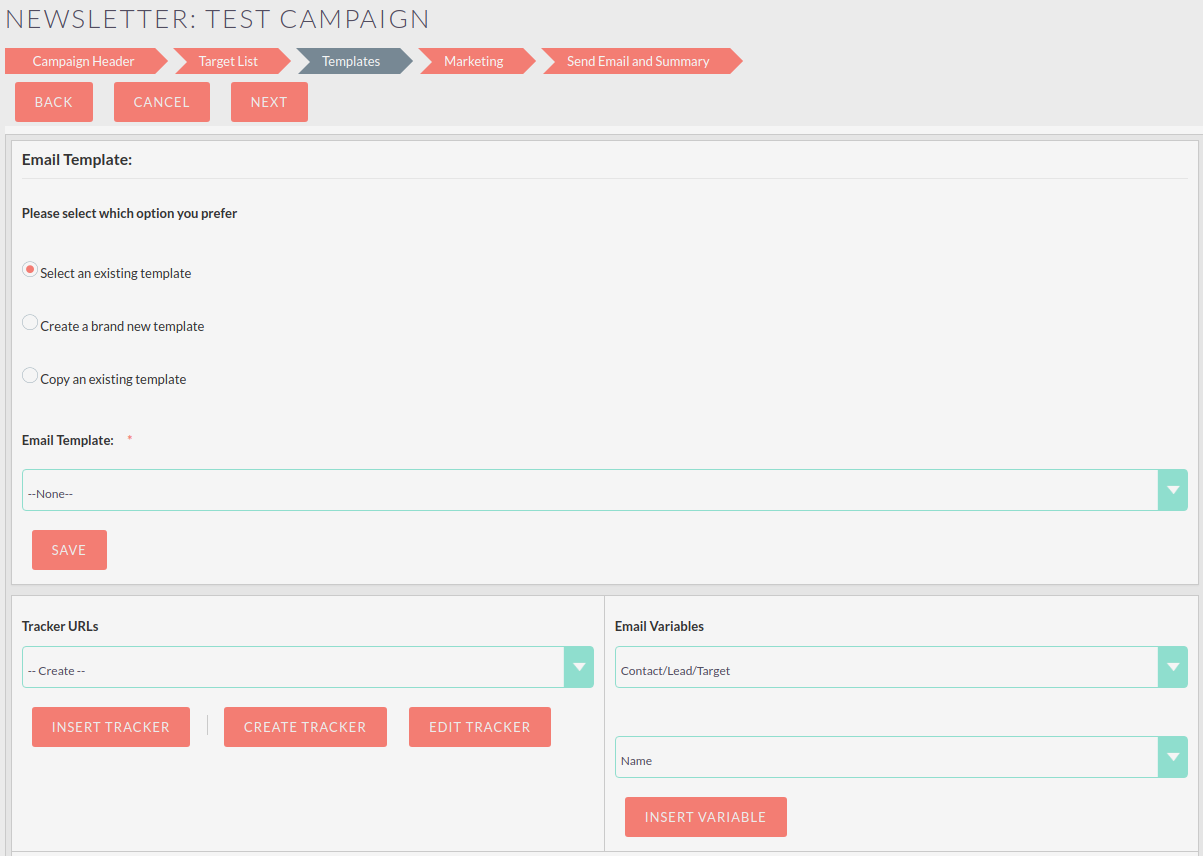
The template is the message that will be sent out to your target list. You can select or edit an existing email template or create a new one here. See the Email Templates section of the user guide for more information.
The template editor used for creating and editing email templates can be selected in the user profile email settings. The default setting (Mozaik) is shown in the following screen shots.
-
Select an existing template – You can select from a drop down list of existing Email Templates
-
Create a brand new template – Create a new email template from scratch.
-
Copy an existing template – Allows you select an existing template and use this as a base to make amendments
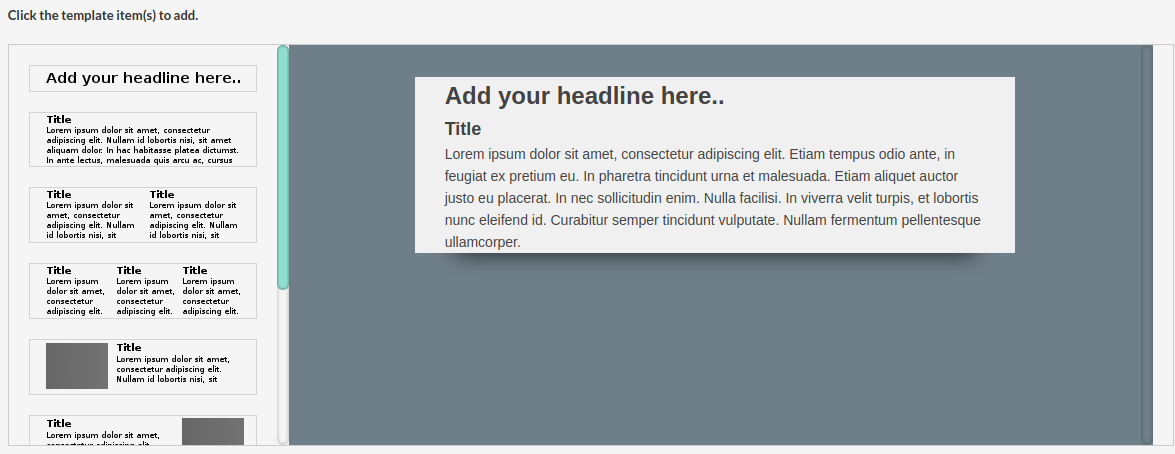
The email template editor at the foot of the page shows how your template will look. Drag and drop different layout components from the left-hand pane into the right-hand display panel where they can be edited.
Clicking on a component will show the edit menu. This provides you with a multitude of additional options which allows you to customise the layout and appearance of your template. Font type can be selected, formatted, colours changed, text alignment chosen, images and even videos can be inserted.
Insert HTML by clicking Tools > Source Code
Tracker URLs
Tracker URLs can be used to insert a link to your organisation’s website or direct link to a new product that you have launched, for example. A unique id is added to the link for each recipient which allows SuiteCRM to track click-thrus. The information gathered can be viewed on the campaign status page.
To add your own tracker URL link, click CREATE TRACKER
Specify the text to display as the link, and the URL.
Click CREATE TRACKER
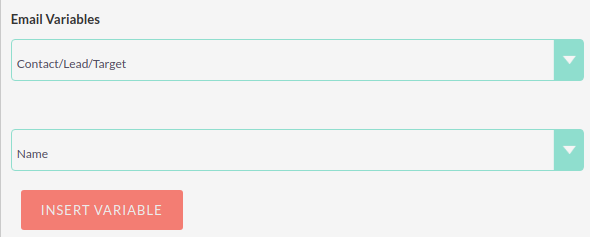
Add your tracker(s) to the template in the same way as for a variable. Click inside the template in the desired location, then select the tracker in the drop down and click INSERT TRACKER
Opt Out Tracker URLs
An Opt Out link allows the recipient to opt out of future marketing emails, and a default opt out link will be added to the template automatically. You can replace this default with your own Opt Out link text by adding a custom Opt Out Tracker.
Click CREATE TRACKER
Specify the text you require for your opt out link.
Check the Opt-Out Link box. Note that you cannot edit the TrackerURL itself, only the link text.
Add your tracker to the template in the same way as for a variable. Click inside the template in the desired location, then select the tracker in the drop down and click INSERT TRACKER
Once your email template is complete, click SAVE.
Click NEXT at the top of the page to continue.
Marketing
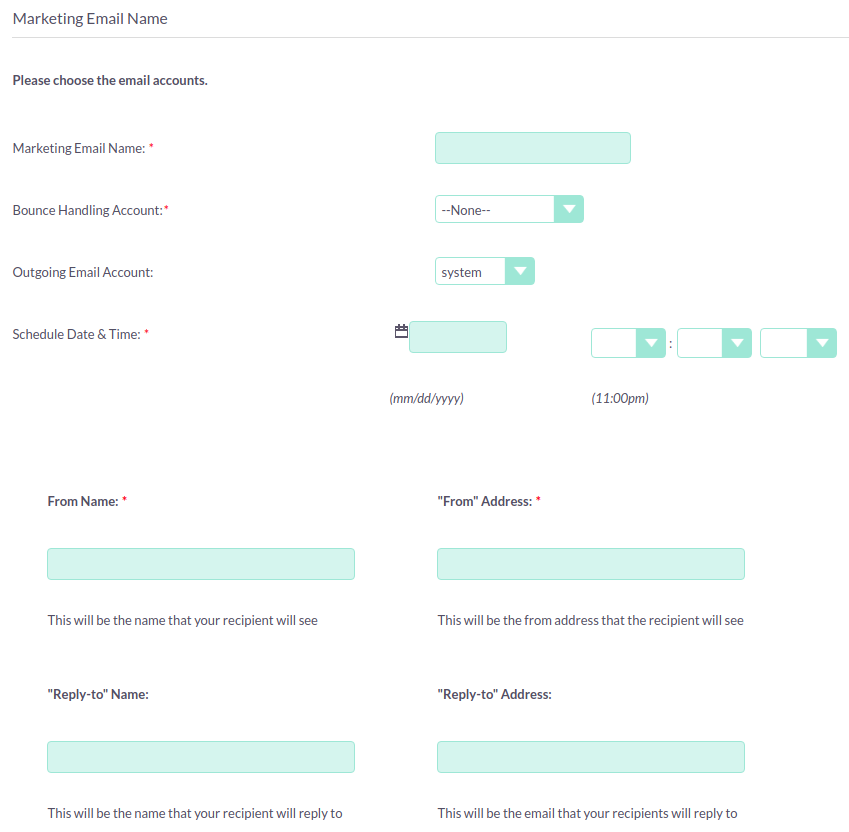
The Marketing section of the Campaign Wizard is where you need to specify the email settings for the campaign, and set a schedule for emails to be sent out.
Marketing Email Name |
Enter a name for the this run of the campaign. This allows you to resend the campaign at a later date to a different target list, or with a modified template. The campaign will store separate status details for each marketing record, and these can be selected on the campaign status page. |
Bounce Handling Account |
Select the account set up to handle bounced campaign mail. |
Outgoing Email Account |
This will default to the system outbound mail account. If you have other outbound mail a |
Schedule Date & Time |
The campaign emails will be queued for sending at the specified time and will be sent when the Run Nightly Mass Email Campaigns scheduled job is next run. |
Once details have been completed, click NEXT at the top of the screen to continue.
Send Email and Summary
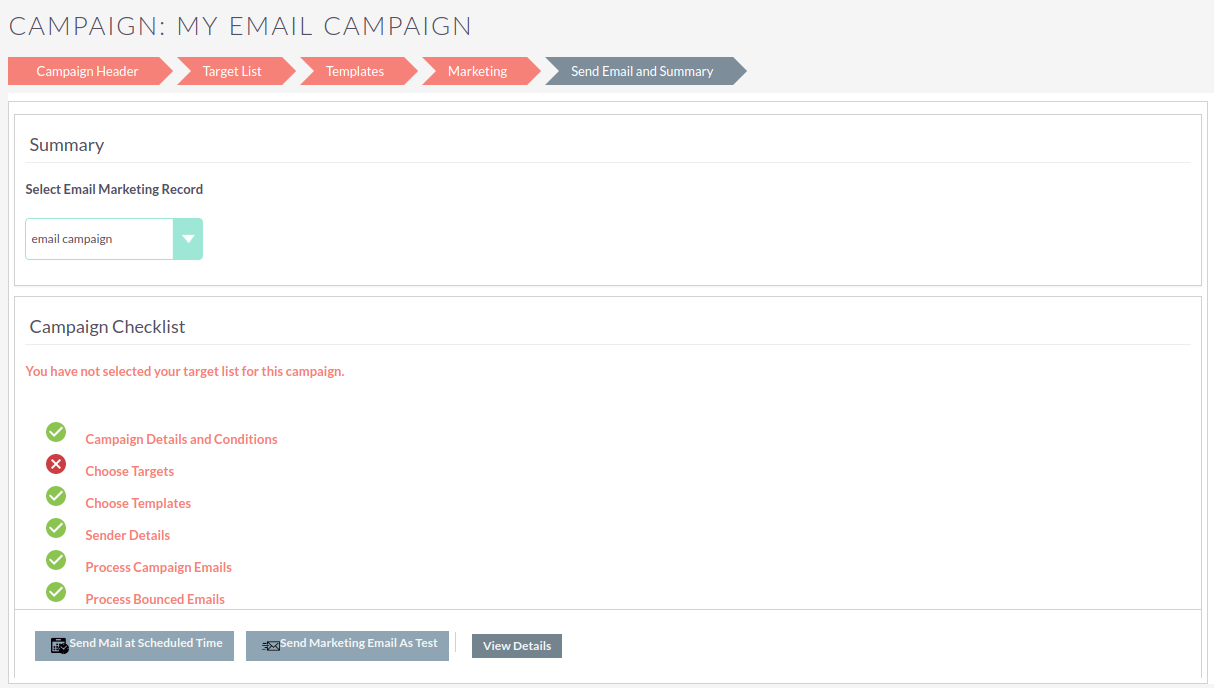
The Summary page includes a checklist which indicates whether or not each section of the Campaign Wizard has been completed satisfactorily.
If a section is complete then this is shown with green tick icon. |
|
Incomplete sections are shown with a red cross. These will need to be resolved before the campaign can be sent. |
In the example above the Choose Targets section has not been completed correctly as indicated by the red cross icon. This would be resolved by specifying a 'default' type target list with at least one entry.
Click on any incomplete entry in the list to navigate to the relevant section.
Once you have ensured all sections are complete you have three options:
-
Send Mail at Scheduled Time – Once you are sure all sections of the campaign are set correctly and your campaign status is set to Active, click to send the campaign emails. Email will be queued at the scheduled time, and will send to recipients when the Run Nightly Mass Email Campaigns scheduled job is next run.
-
Send Marketing Email as Test – If you have specified a 'test' type target list, this will send the campaign to the addresses on the test list only. By doing this you can view the campaign as a recipient and double check that it appears as it should do before sending out to real recipients. Test entries (views, click-thrus etc) generated can be removed later from the campaign status page.
-
View Details – Shows the Detail View of the campaign you have just created.
Campaign Status and Response Tracking
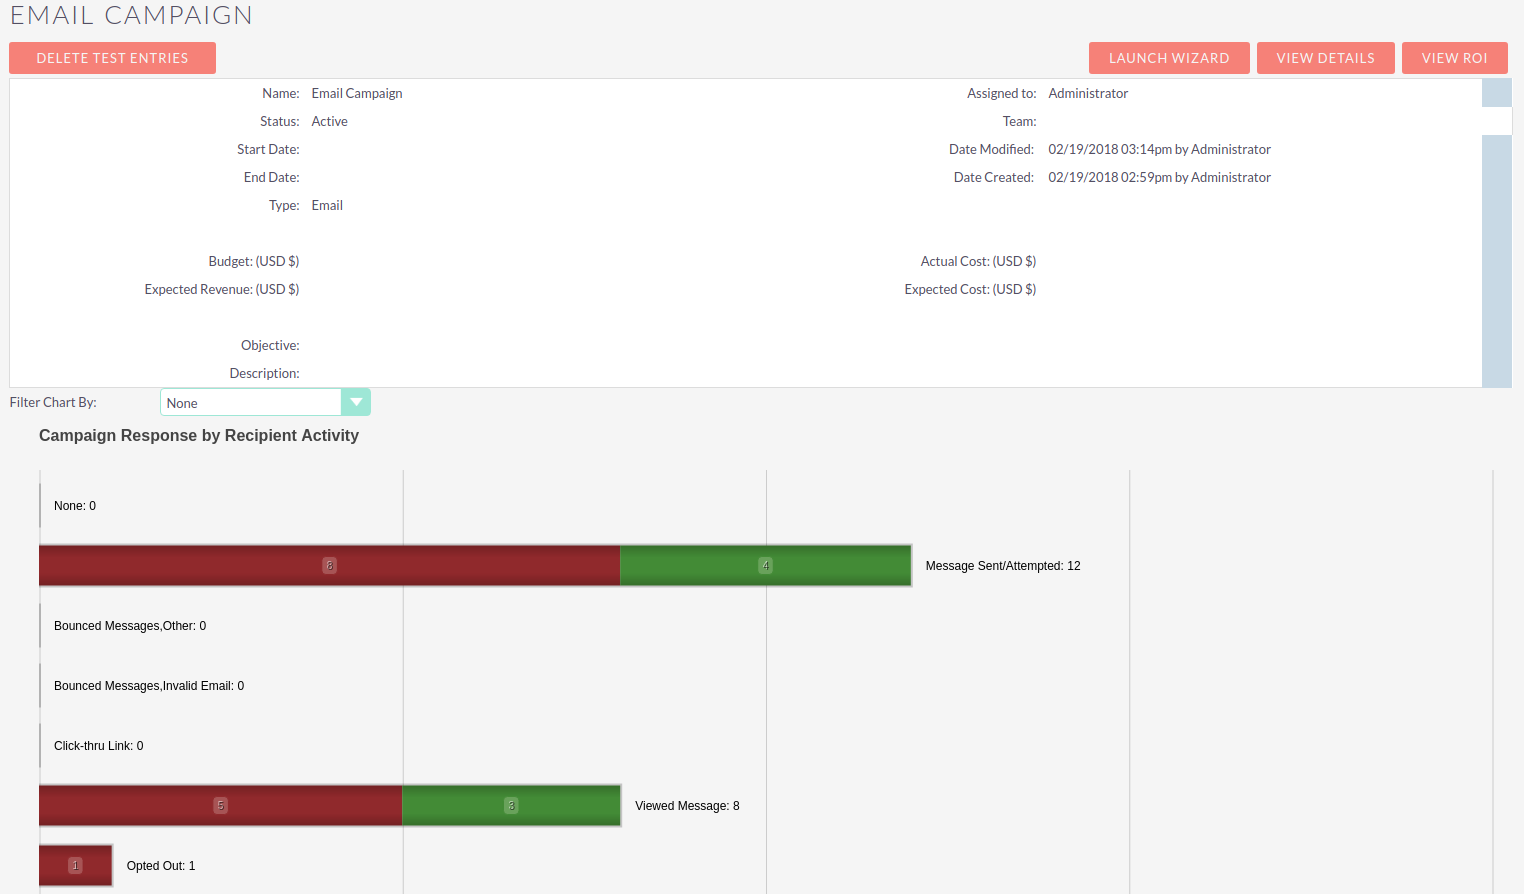
From the campaign’s Detail view click VIEW STATUS
OR, from List view, click the status icon |
The campaign status page gives an overview of the campaign details as well as a graphical representation of your campaign response. This includes the number of messages sent, bounced messages, number of views, opt-outs and click-thrus.
Detailed information can be viewed in the subpanels below the graph, where responses are detailed on an individual record level. Here you can see who has viewed your email or clicked on a link, or how they have responded to a survey, for example.
If the campaign includes a Web To Person form you will be able to see the details of any leads which have been created via the webform in the Leads Created subpanel.
These records can be added to a new target list by clicking Add to Target List This allows you to create new, more focused campaigns based on who has responded.
Delete Test Entries
Click DELETE TEST ENTRIES to remove any entries on the campaign status page that have been generated during testing with a 'test' type target list.
Campaign ROI Tracking
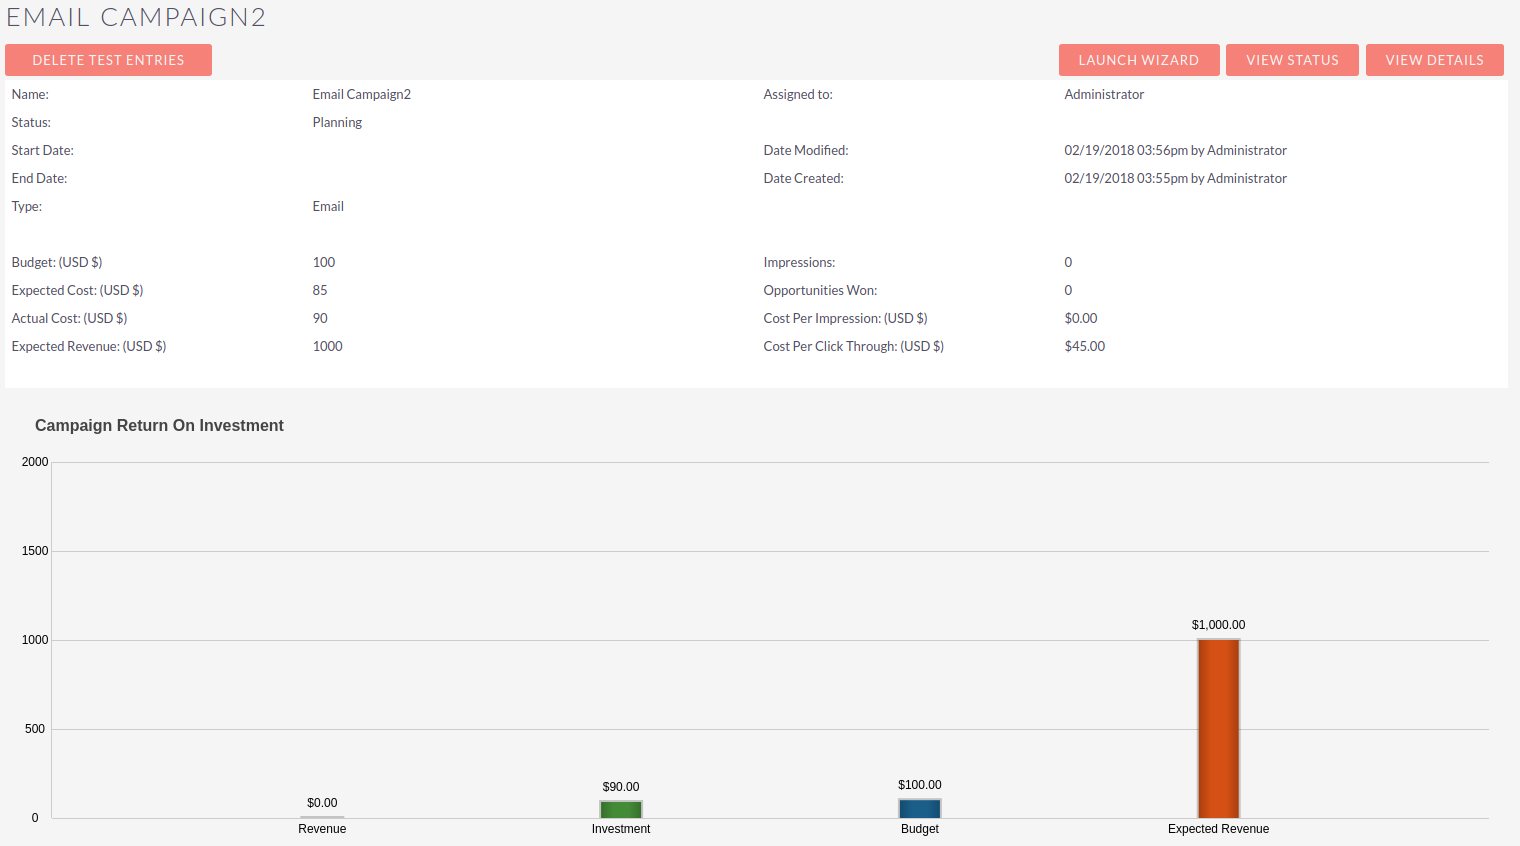
The built-in campaign ROI tracking can be viewed from the campaign’s detail or status view by clicking VIEW ROI
This page gives a graphical representation of your campaign’s Return on Investment, allowing you to easily visualise how money spent on the campaign has translated into potential business.
Add or edit budget details for the campaign by clicking Launch Wizard and then navigating to the Campaign Header tab.
Web To Person Form
The Create Person Form feature allows you to create a web-based form which will create a Lead, Contact or Target record in SuiteCRM from the information submitted on the web form. These records can be assigned to a particular user and are linked to a campaign so responses can be tracked.
You will need to relate your Web-to-Person Form to an existing campaign. See the Create a Campaign section for instructions on how to do this. A non-email based type campaign is suitable for this
Click Create Person Form on the sidebar, or select Create Person Form from the Campaigns dropdown menu to open the wizard.
Create Person Form Wizard
Select the type of record you wish to create from the web form information: Lead, Contact or Target, from the dropdown at the top. The list of available fields will update automatically following your selection. Use the scroll bar to see the complete list of available fields.
Drag and drop the fields you wish to include on the form into the empty form columns. You have the option of a one or two column layout. You must include any required fields (these are indicated with an asterisk* and are highlighted in the list).
Click ADD ALL FIELDS to add all available fields to the form. Clicking RESET ALL FIELDS will remove all fields from the layout columns.
Once the required fields have been added, click NEXT to continue.
Create Person Form – Additional Information
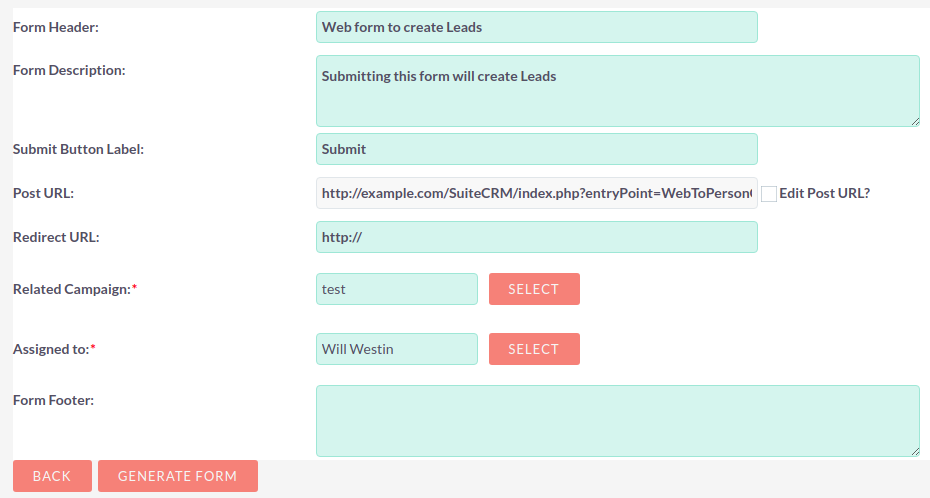
Configure the web form’s appearance by adding a header or footer and changing the label for the form’s submit button if desired.
Redirect URL: Specify a custom link to display once the form has been submitted.
Related Campaign: You must relate the form to an existing campaign. Click SELECT to select the campaign from the popup.
Once complete, click GENERATE FORM
Create Person Form – Editor
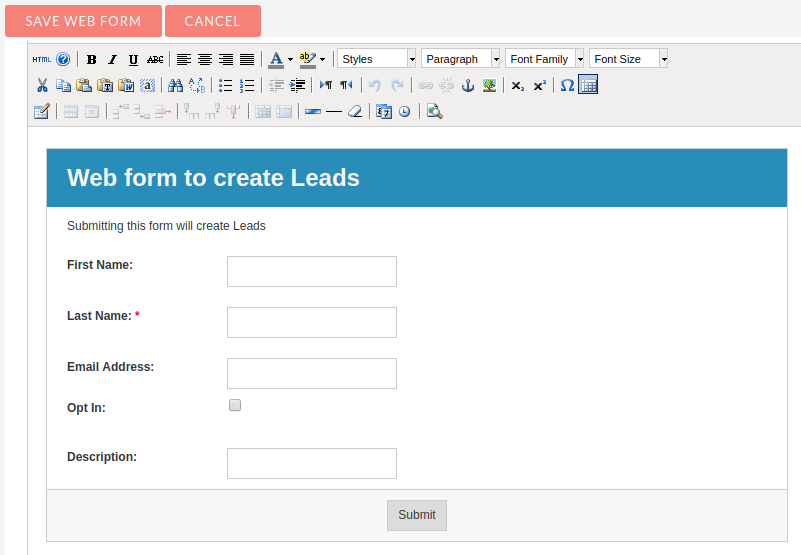
The final step of the Create Person Form Wizard allows you to format the web form you have setup using the editor. Font type can be selected, colours changed, text alignment chosen and images can be inserted. View and edit the HTML directly by clicking the HTML link on the toolbar.
Once you are happy with the appearance of your web form click SAVE WEB FORM
Save Form
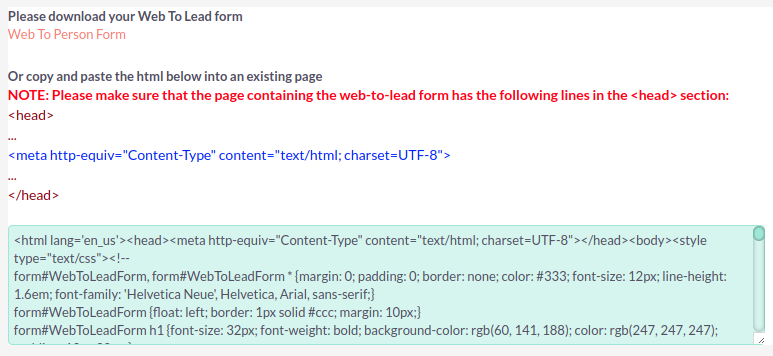
To save the web form you have just generated either:
-
Click on the Web to Person Form link to download the web form into your download folder OR
-
Copy and paste the HTML into an existing web page. Note the line to include in the <head> section of the web page.
Please note that the web form will not be stored anywhere else in SuiteCRM. To ensure the form is saved please carry out one of the two steps above.
